A DIY can be daunting, especially if you have a seriously large lawn. Before we specify in detail how the DIY Installation Guide process goes, we should probably cover the basics first.
Here are the major points you have to remember when choosing your artificial grass. We listed them down below for your consumption.
Gather your tools and equipment:
Turf cutter (optional)
Stanley knife/blades
Tape measure
Timber (50×75 H4 – either a 50mm piece or 25mm piece of timber)
Hammer
Compactor
Joining tape or glue
Twisted fixing nails
Infill
Power broom or a good old fashioned hard bristle broom
Drop spreader
4mm square Trowel
Step 1.
Weeds! You don’t want weeds to ruin your newly installed artificial lawn.
Spray the installation area with a non-toxic weed killer you trust. Make sure there are no other existing vegetation on the area you want to install your turf on. Do this before you start your landscaping project to give the weed killer ample time to work. Keep in mind that it is mandatory that the plant material is dead down to its roots.
Step 2.
Remove the top level of the soil.
To make room for the new base, dig the top by 7-10cm. There are a lot of tools you can use to break up the soil easily. If there are existing grass, weeds, or other plants on the area, make sure to remove them so they don’t create an uneven surface after they die.
When excavating rain-soaked soil, let it dry for a few days before you proceed. This will minimize the chances of slumping. A slight fall as you would with concrete will help improve drainage, and although the remaining surface doesn’t have to be perfectly graded, you would do well to walk over the area to apply pressure to any loose soil.
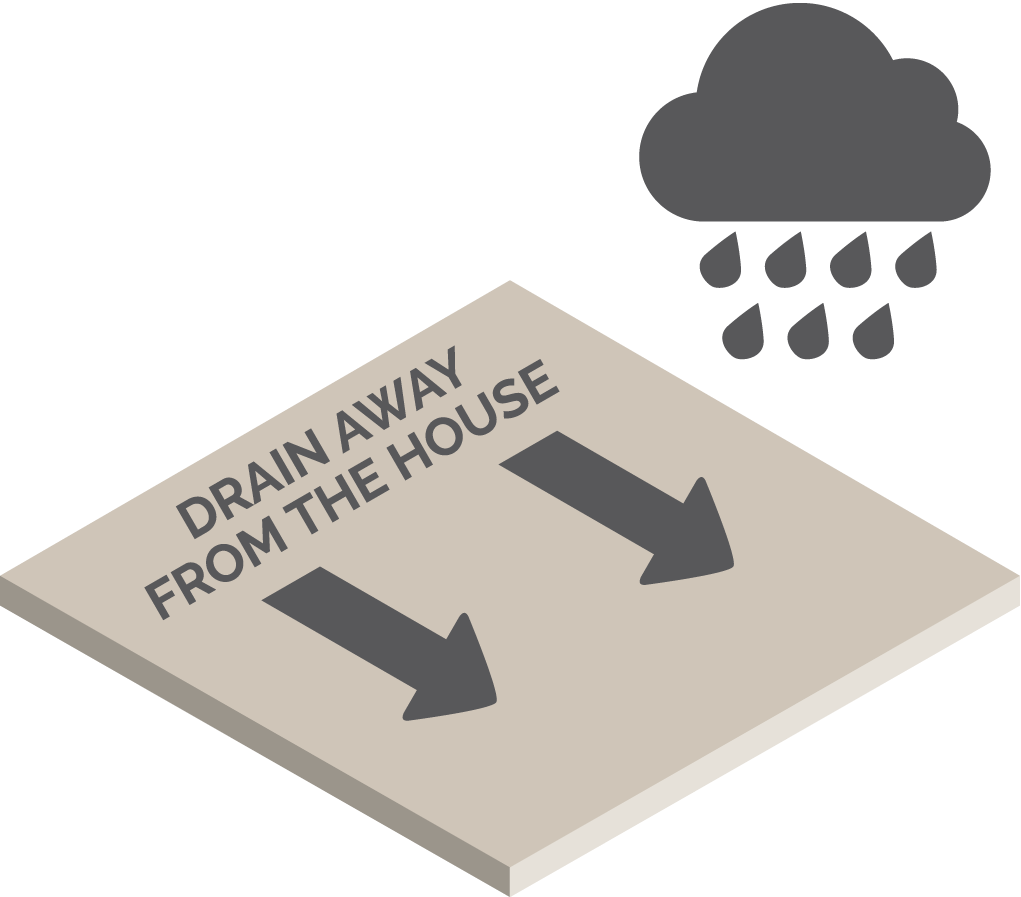
Step 3.
Carefully plan your drainage.
Installations built on top of well-draining soil should give you little to no problems, as the synthetic grass is permeable. If, however, you have no choice but to install on top of poorly draining soil or a hard surface such as concrete, it’s best you take the following precautions: in the absence of a drain near the lawn, install an efficient drainage system before you continue.
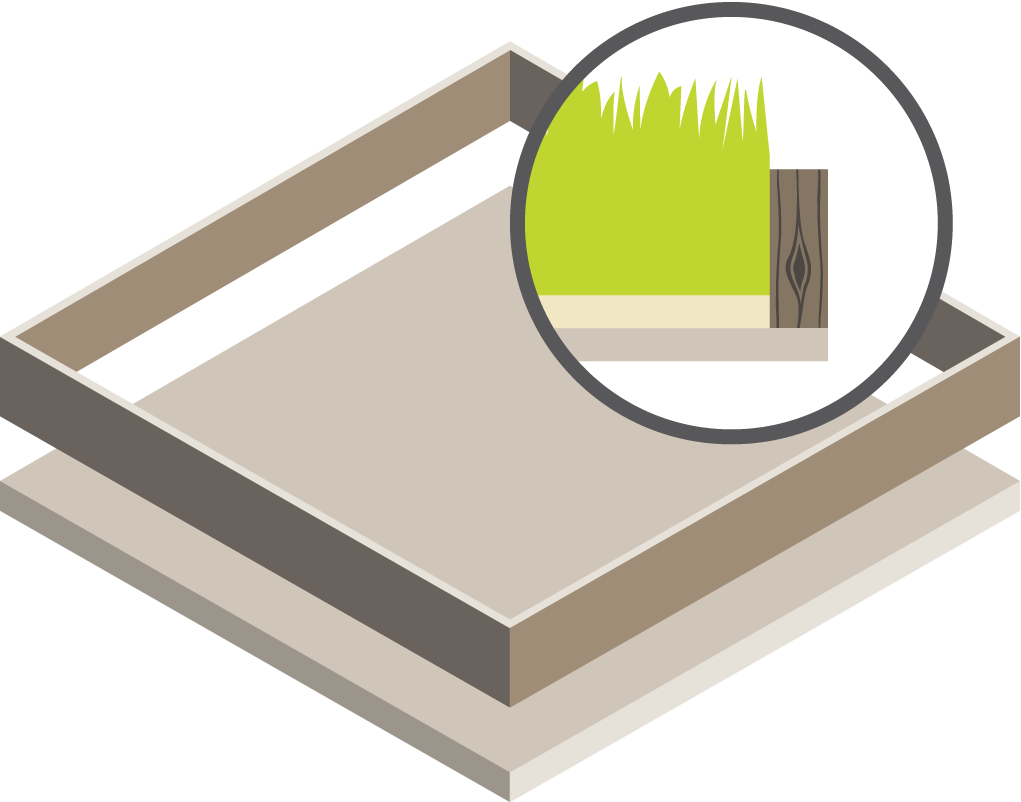
Step 4.
Install your fixing timber.
We recommend that you install an exposed piece of timber. This will be seen when the grass has been installed and will double as an edge for the garden. We use a piece of 50×75 H4 as the exposed piece and either a 50mm piece or 25mm piece of timber to fix the grass to. The fixing piece of timber is installed 15mm below the exposed piece. This will allow the basecourse to be completely flush and compacted to finish flush with the fixing timber. The grass will then be installed over the basecourse and fixed to the fixing timber, leaving only one piece of timber exposed. This piece of timber now looks like a regular mow strip making your artificial lawn look even more realistic.
Step 5.
Install a base.
Lifestyle Lawns works with a minimum of 100mm for the base of on artificial lawn. This is made up of 80mm of AP20, 20mm of GAP5 or Crusher Dust. The base is compacted in layers to ensure there is no movement in the preparation. The finer crusher dust is spread over the area and compacted to level the area and to ensure no larger stones are felt underfoot.
Step 6.
Slightly wet and compact the base.
Lightly sprinkle the base with a garden hose to lubricate the material in preparation for compaction. Be careful not to overwater the base. We suggest you use a plate compactor to apply pressure until a sturdy base is achieved. Ideally, the base should be reduced to around 90% of its original depth, it should feel like concrete but retain its permeability.
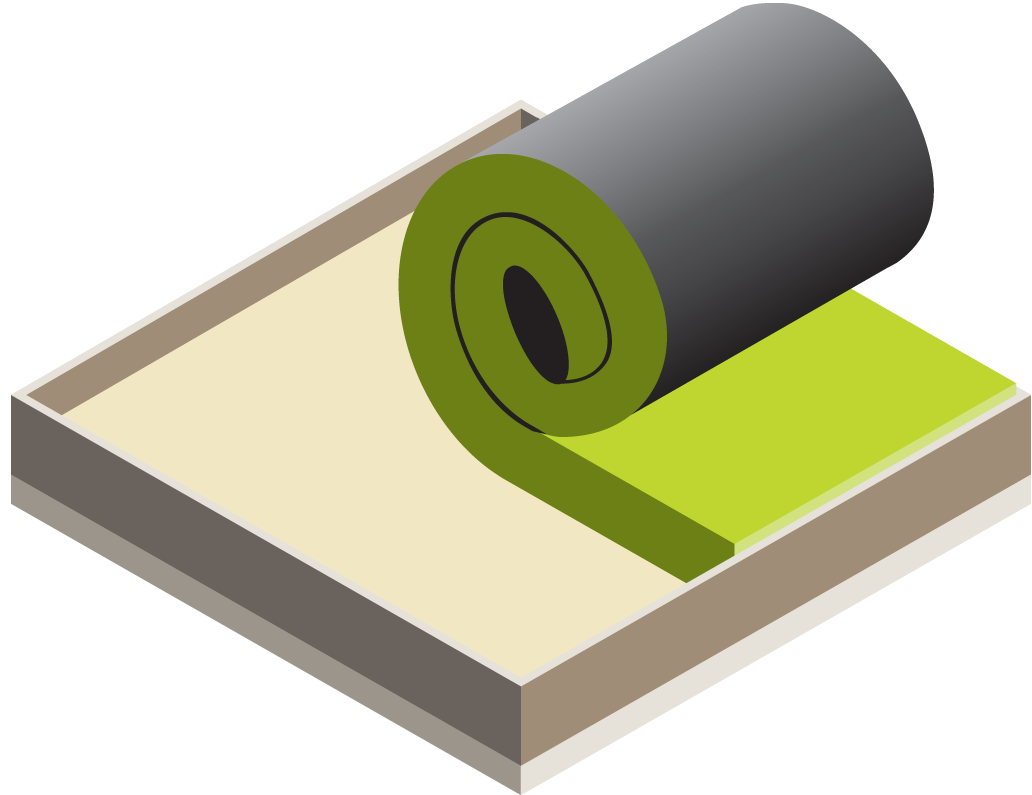
Step 7.
Roll out the lawn.
On the side of your prepared base, roll out the lawn as it dries. Unrolling the turf during this time, gives it a couple of hours to recover its shape after being tightly packed for shipping and transport. Check that the base material is dry, smooth, and firm before you proceed with the next step. If the base is not smooth, more compaction is required. If the base is lower than expected, you may need to add another layer of material. This is to guarantee that when you join the seams of the synthetic turf together, it isn’t an uneven mess. Any misstep in this step (no pun intended), will result in an overall wavy look to your space.
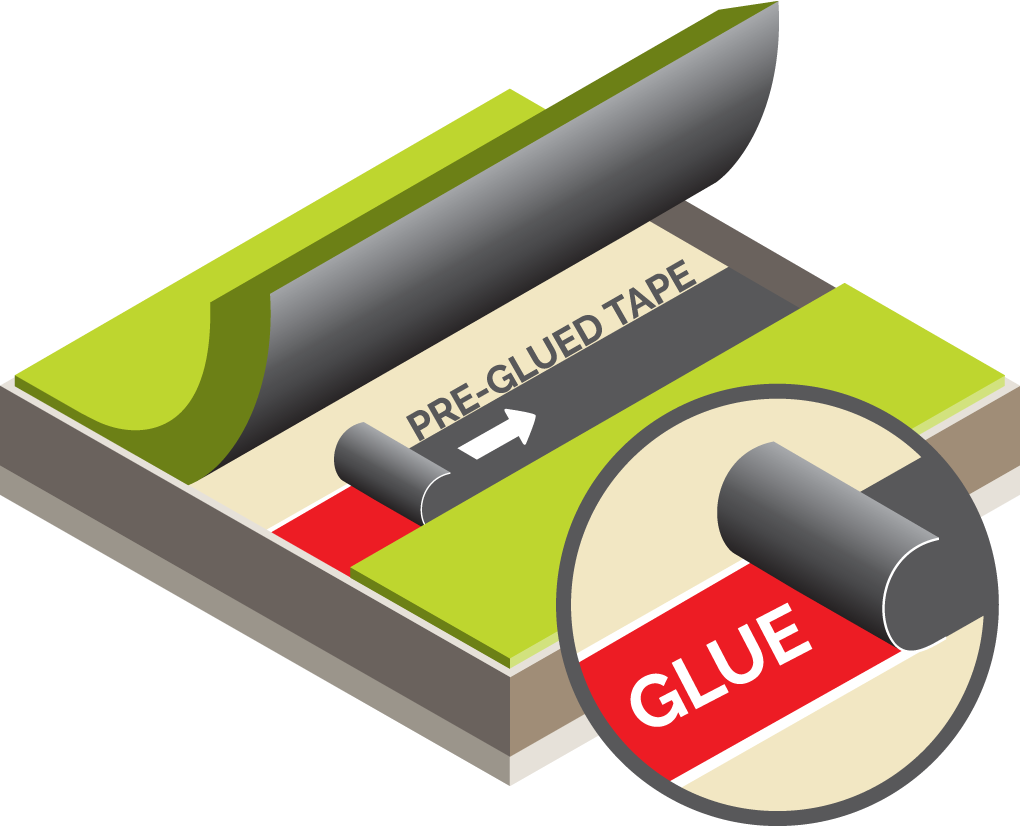
Step 8.
Laying your seam.
Joins or seams can be installed by either a 300mm wide backing tape, an outdoor adhesive or a pre glued 150mm tape. For installation of high traffic areas or longer joins we would recommend the backing tape and glue method. We can supply a heavy duty aluminium backed pre glued seaming tape in a 10m roll. This tape has a peel off backing so can be installed with the backing still attached while the grass pieces being joined are moved into position. Once ready the tape backing can be removed and pulled through the gap between the two pieces. By applying pressure to the two pieces while the backing is slowly removed will allow the seaming tape and grass backing to merge and lock the join in. This is nice, easy and a fast way to install.
Step 9.
Place in position.
Once the turf is in position and joined, the final cutting and trimming is required. We would recommend using a Stanley knife. The main thing is to ensure the blades are nice and sharp for a clean cut.
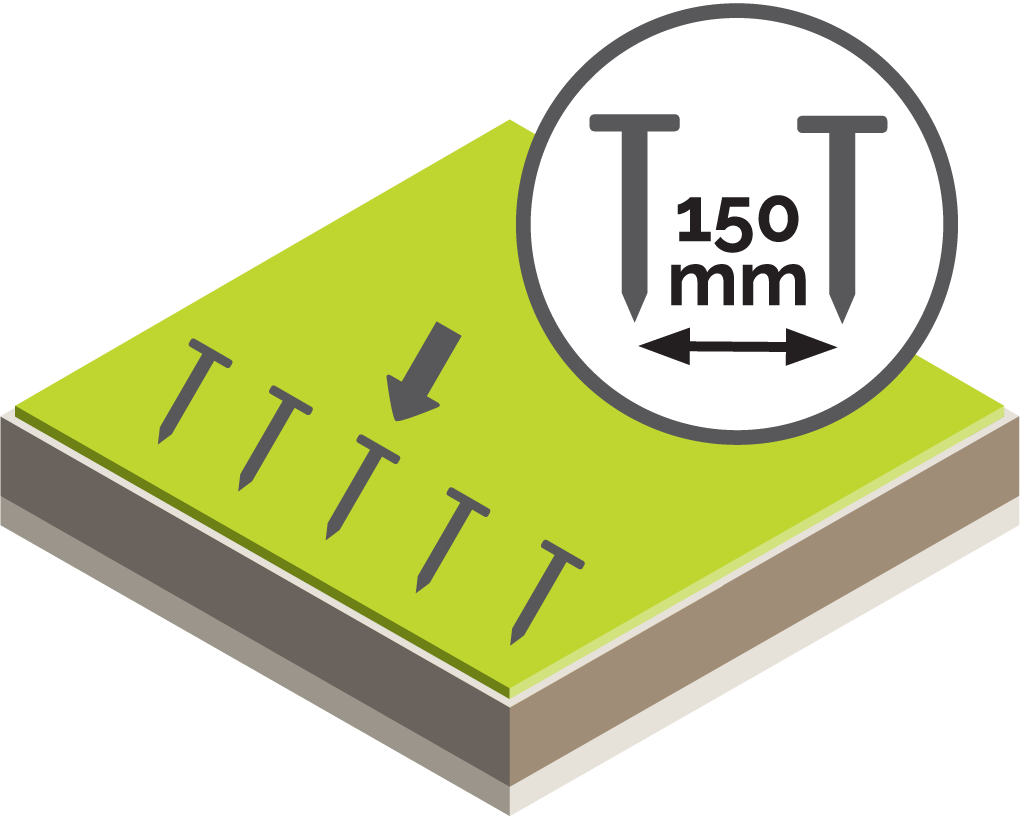
Step 10.
Fix to the edging.
We would suggest fixing the turf to the edging with small flat head nails or a staple gun with a staple longer than 14mm at a spacing of around 150mm centres.
Step 11.
Add your infill.
The infill is applied by a drop spreader which allows the infill to flow evenly through the drop spreader to ensure an even application. The infill is required to protect the fibers, hold the grass in place and stop the fibers from flattening.
Once the grass has been through each of the above steps, a power broom would be required.