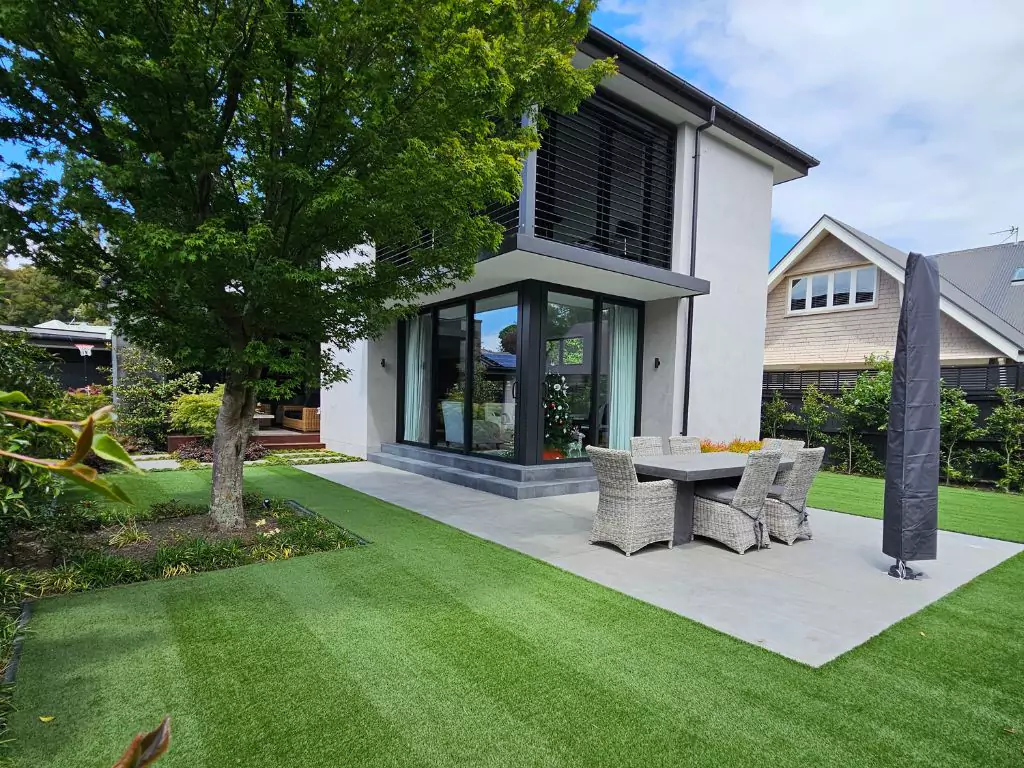
They see you rollin’, they hatin’… You could be the envy of all of your neighbours, rolling out a fresh, new, artificial grass lawn this summer!
Artificial grass is the stuff low-maintenance, water-saving, manicured-lawn dreams are made of! But how do you go from where you are now, with that patchy, lumpy, browning, real grass lawn, to having the lawn you’ve always wanted? You get the experts at Lifestyle Lawns to install your artificial grass for you!
…or, you install it yourself! If you’re a Kiwi who loves the chance to DIY, then you’ll want to read our top tips to avoid making any mistakes and ensure your artificial grass installation goes flawlessly.
Artificial Grass Installation Mistakes and How To Avoid Them
Before we get ahead of ourselves, and before you even think about installation, it’s crucial that you find the artificial grass that best suits you, your family, and your space. If you’re not sure where to begin, let us know and we can walk you through our products, and recommend the best option for your garden. We can also help you choose the best infill for your chosen artificial grass, and hook you up with the right tools to install your new lawn.
You might like to read over our DIY Installation Guide before you get going with your artificial grass installation. There, we outline the process of installing artificial grass, step-by-step, so you have a clear idea of what to expect when it comes time to do the heavy lifting.
Now, onto the fun part! Here are some of the biggest mistakes to avoid, think of it as what not to do.

1. Skipping the prep work
Careful preparation is the most crucial step to ensure that your artificial grass installation goes off without a hitch and your lawn lasts for years to come. We do offer a 10 year warranty on all of our artificial grass (yes, our grass is that good), but only when installed as recommended.
So, make sure you remove any weeds and debris from the area where you’ll be installing your artificial grass. If you’ve got any pesky weeds growing, we recommend using a non-toxic weed killer on the area and giving it time to kill any undesirable plants in your way – don’t rush this, good things take time, but it’ll be worth it when you’re lounging on your perfect new grass, we promise!
Once your weeds are gone, gather all the right tools for the job:
- Turf cutter (optional)
- Stanley knife/blades
- Tape measure
- Timber (50×75 H4 – either a 50mm piece or 25mm piece of timber)
- Hammer
- Compactor
- Joining tape or glue
- Twisted fixing nails
- Infill (more on this below)
- Power broom or a good old fashioned hard bristle broom
- Drop spreader
- 4mm square Trowel
If you’d like to make things simple for yourself, we have a DIY kit available for hire. The kit includes a blower, drop spreader, staple gun and staples, power broom and batteries – basically, everything you need to install your artificial grass!
Once you’ve got the tools, it’s time to get your hands dirty! It’s time to install the fixing timber to the edges of the lawn area. The timber will keep your base contained, give you something to fix your artificial grass to so that it doesn’t ripple or move, and it’ll give you a crisp garden edge too!
Once your timber is in place, it’s time to lay the base! You can’t go wrong with 80mm of AP20 and 20mm of GAP5 or crusher dust. Once you’ve poured this in, and leveled it off roughly, give it a gentle spray of water, and then with a compactor, you’ll want to compact it to about 90% of its original height.
While you’re busy with your base, we recommend that you unroll your artificial grass and lay it out somewhere out of your way so that it can relax (this will help to avoid any crinkles from being rolled up and transported to you once you go to install it on top of your prepared base).
2. Not rolling with it
How many lawns you know roll like this? Not many? If any? Well then, why not let us help you out with your roll plans? We can provide a custom roll plan to take the guesswork out of laying your lawn in your space.
What is a roll plan? Well, the thing is, once your base is ready, your grass is relaxed, and you’re ready to install it, you need a plan to roll out your lawn to achieve optimal performance and aesthetic appeal! It is crucial to install the artificial turf facing the correct way. The direction of the turf blades influences the overall appearance, resilience, and functionality of the surface. Proper orientation ensures a consistent and natural look, resembling real.
3. Choosing the wrong infill
Once your artificial grass is installed, you’ll need to add your infill. Infill helps keep the grass fibres upright so it looks lush and also provides extra cushion for your own comfort and protection for your lawn. With so many great options of infill for your grass, let us know if you’d like a hand choosing the right product for you, your family, and any furry family members who will use your lawn.
Even if you don’t have a dog in your family yet, you can future proof for any fur-babies by choosing a dog-friendly infill like Envirofill.
Once you’ve dispersed your infill and fluffed up your fibres with a stiff broom, if you notice that your lawn has gotten dirty during the installation process, fret not! Feel free to give it a hose down to wash away any small bits of muck and it’ll be looking pristine in no time!
The most important thing to remember!
The most important thing to remember to ensure your lawn installation goes smoothly and you don’t make any unforgivable mistakes is that you’re not alone – we’re here to help!
Installing artificial grass is easy once you know how, and if you can avoid these common mistakes, we’re sure that your lawn will look stunning and last for many years to come. Just remember to choose the right products for your needs, don’t skip the prep work, keep on top of regular maintenance, sing out if you’d like any help with your artificial grass installation and your lawn will be the envy of the neighbourhood!